Performance
at Macro Distances

100mm
f/4 MD Macro @ f/8
100mm
f/3.5 MD Macro Rokkor-X versus |
||||
100mm
f/4 MD Macro |
||||
Performance
at Macro Distances |
||
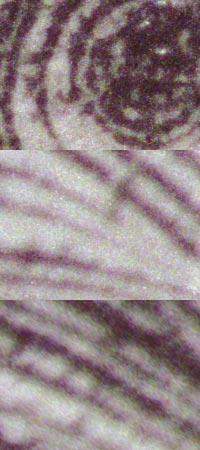
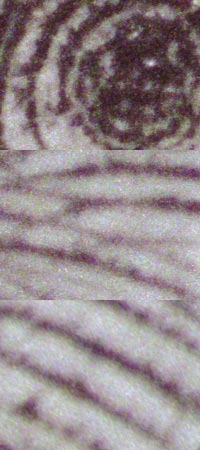
| The following images were all shot at 1:1 magnification, using the extension tube for each lens. The subject (a portion of a US $10 note) is shown as a full frame below. | ||
|
||
100mm
f/4 MD Macro @ f/8 |
Performance
wide open |
||||
| 100mm f/3.5 @ f/3.5 |
100mm
f/4 @ f/4 |
|||
 |
|
|||
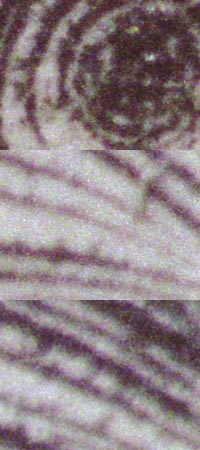
In the crops above you will note that the side and corner images are not exactly the same between the two lenses. Apologies for this, but the crops should still be perfectly able to be utilised for assessing the differences between the lenses. Unfortunately, when examining the crops it is also evident that the image also contributes to the problem of assessing the performance due to the fact that the technology used in the note design results in the lines having less than perfectly consistent edges. As a result I may perform this again at a later date with an Australian note that uses hard-edged micro printing. That said, looking at the crops above, I feel that the f/4 lens marginally outperforms the f/3.5 lens when wide open. The centre of the f/4 lens appears slightly sharper to my eyes, and the side and corner crops , while very close, also appear a little better. Both lenses appear to have some minor colour fringing in the corners, although this is less evident on the later design. The performance of both lenses is, however, very creditable. |
Performance
at f/5.6 |
||||
| 100mm f/3.5 @ f/5.6 |
100mm
f/4 @ f/5.6 |
|||
 |
|
|||
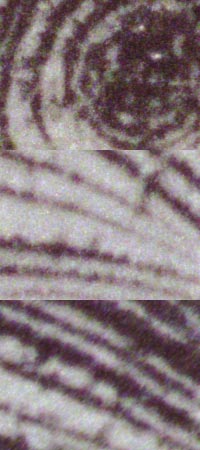
Looking
at the 100% crops above it is hard to pick between the lenses at f/5.6.
I feel that the new f/4 design performs slightly better, but it is really
too close to call. The f/3.5 corner sample still records some colour fringing,
but it is very minimal and would be unlikely to be seen except on a lens
test using hard black and white lines. |
Performance
at f/8 |
||||
| 100mm f/3.5 @ f/8 |
100mm
f/4 @ f/8 |
|||
 |
|
|||
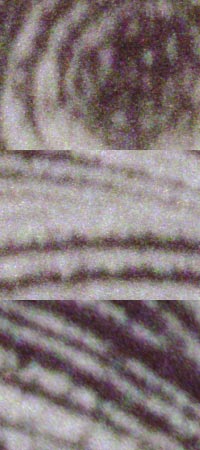
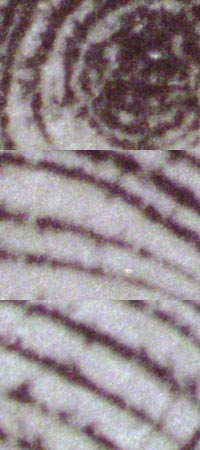
At
f/8 both lenses perform very well, but I believe the later design appears
slightly sharper in its centre detail.. |
Performance
at f/22 |
||||
| 100mm f/3.5 @ f/22 |
100mm
f/4 @ f/22 |
|||
 |
|
|||
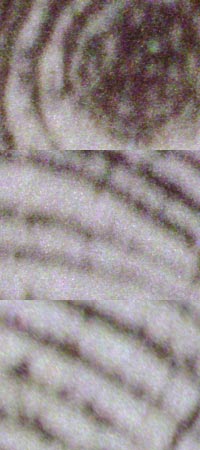
The
above crops should be enough to persuade anyone of the detrimental effects
of diffraction. When a lens is closed down to a small aperture, the light
entering the lens is diffracted, resulting in less than optimally sharp
images. In this case the difference between the f/8 samples and the f/22
samples is astounding. Many macro photographers will always stop their
lenses right down for the extra depth of field, and as this example shows,
this has a cost in terms of resolution. The answer? If you can survive
with less dof, then stick to apertures of f/11 and below. |
Flare
Resistance |
||
For
the following test both lenses were placed in a position where full sunlight
was falling on the front element to determine the level of flare and light
scatter that they would suffer. This test was actually a huge surprise
for me, as the results were obvious directly in the viewfinder! |
||
100mm
f/3.5 MD Macro |
||
 |
The
earlier model 100mm Macro has obviously suffered a great deal of light
scatter and flare when the front element is placed in full sun. This means
that use of an appropriate hood is vital when using this lens in sunny
conditions to avoid image degradation and loss of contrast. |
||||
|
100mm
f/4 MD Macro |
||||
 |
||||
|
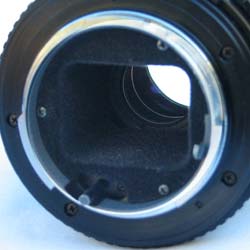
The
f/4 version of the lens records a much better result under the same circumstances.
This may be attributable to better coatings, but additionally, the inner
rear of the lens has a different construction which includes a flocked
hood which presumable contributes to the improved performance. The rear
of the two lenses is shown below: |
||||
 |
 |
|||
The
inner of the 100 f/3.5 lens, showing its rear hood which is a matte black
ribbed metal tube. While effective at reducing reflection, the later flocked
surface seems to work more effectively. |
The
flocked inner rear hood on the later f/4 lens is so good at reducing reflected
light that it is very difficult to actually photograph. In fact for this
shot I had to use a curves mask in Photoshop to brighten it to a point
where it was easily visible. |
It
is noted that the flocked rear hood is only evident in the Late MD version
of the F/4 lens. The examples of the f/4 that appeared during the late
MD Rokkor period had the previous style metal hood. |
Lens
Bokeh |
||||
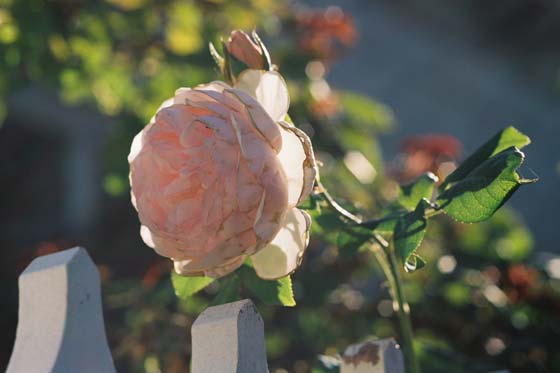
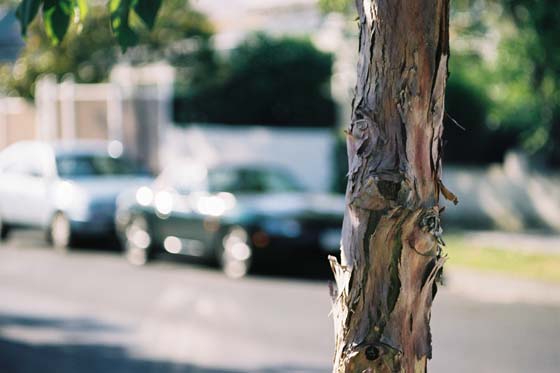
| The term "bokeh" is derived from a Japanese word, and is used to describe how the out-of-focus parts of an image are rendered. The test below has been designed to demonstrate the bokeh of the two lenses, and has been conducted at f/3.5 and f/4 respectively to show how both lenses perform wide open (as they would likely be used for portraiture). | ||||
 |
||||
The
above image was taken with the 100mm f/3.5 at f/3.5, and provides an indication
of the overall image. At first glance, the bokeh of the lens appears reasonable.
We will be comparing specific crops of the image to determine the performance
of both lenses. |
||||
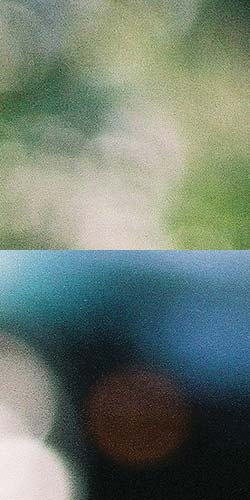
100mm
f/3.5 MD Macro |
100mm
f/4 MD Macro |
|||
 |
 |
|||
The above crops show that the f/4 lens has what is defined as "neutral" bokeh, where the out of focus areas are shown as a well defined, evenly illuminated circle. This is common with modern lenses designed to be "perfect", but it can result in definition being given to things that are meant to be undefined. The earlier model f/3.5 lens provides an example of the "good" bokeh for which many Minolta lenses are renowned. In this case the edge of the highlight is more fuzzy, and as a result the lens has the capacity to have a smoother background. This is actually caused by spherical aberration. Accordingly, the f/3.5 shows that it, indeed does have some advantages over the later f/4 model. If you are seeking a 100mm macro that can also double as your primary portrait lens, the slightly faster aperture and better bokeh of the f/3.5 lens may be useful to you. |
||||
Summary |
||||
| Well, the tests and crops detailed above demonstrate to my satisfaction that the 100mm f/4 MD is the better lens of the my two examples two in terms of sharpness, contrast and flare resistance. I would like to point out, however, that this result does not mean that all 100mm f/4 MD lenses will outperform their f/3.5 counterparts - after all, sample variation can make one lens perform much better than another of exactly the same design. However, issues such as contrast, light falloff and flare resistance I believe are probably common to the different designs, and accordingly I would recommend the later design if these factors matter to you. Certainly, if using the f/3.5 lens, the use of a lens hood is adviseable. |
||||
|
||||